How to Create Tortoiseshell Nails Using Blooming Gel
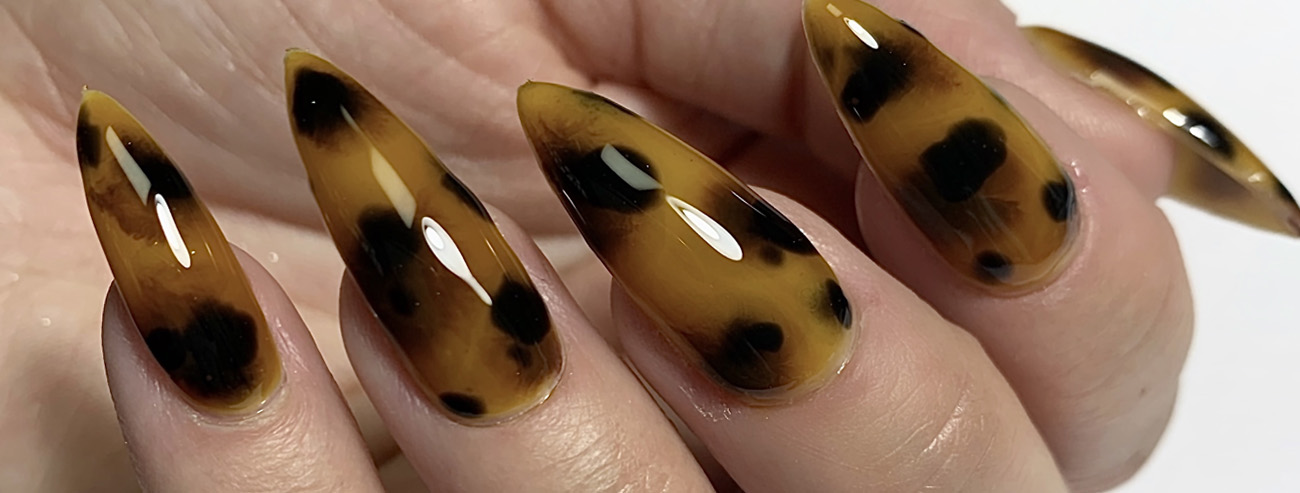
Nail trends are constantly evolving, but one look that continues to stand out for its classic, luxurious feel is the tortoiseshell nail design. The intricate marbling of warm tones gives off a timeless elegance that suits any occasion, from casual outings to high-end events. With the right technique and the perfect products from The GelBottle Inc™, achieving this look has never been easier. Let’s dive into how you can master the tortoiseshell nail art using Blooming Gel, Vanilla, Jet Black, Chocolate, and Glass Yellow for a flawless finish.
What is Blooming Gel?
Before we jump into the steps, it’s important to understand the magic behind Blooming Gel. This unique product allows gel polish to spread and bloom into soft, fluid designs, making it ideal for creating artistic effects like tortoiseshell patterns. It’s incredibly versatile, offering nail techs a chance to get creative and experiment with different styles. Whether you’re creating floral, marble, or tortoiseshell effects, Blooming Gel is your go-to for achieving that smooth, blended look.
What You’ll Need to Create Tortoiseshell Nails
To get started, here’s a quick list of essentials you’ll need for the perfect tortoiseshell nails:
- ProPrep (Cuticle Pusher)
- Vanilla, Jet Black, Chocolate, and Glass Yellow gel polishes

How to Create Tortoiseshell Nails in 6 Steps
Let’s walk through how to create this stunning nail art step-by-step. With the right prep and application process, you’ll have your clients raving about their luxurious nails!
1. Prep Your Nails
As with any gel manicure, nail prep is crucial to achieving long-lasting results. Start by shaping the nails using a 220/240 Nail File and gently buff the surface with a 100/180 Nail Buffer to remove any shine. Push back the cuticles using ProPrep (Cuticle Pusher) for a clean surface.
This step is essential in ensuring the gel polish adheres properly and doesn’t lift prematurely.
2. Apply Your Base Coat
After prepping the nails, it’s time to apply the 2-in-1 Base Coat. This creates the perfect foundation for your gel polish, ensuring a smooth application and long-lasting wear. Once applied, cure the base coat under your TGB Light The Way Nail Lamp for the recommended time (usually 60 seconds).
3. Apply Your First Layer of Colour
To start building the tortoiseshell look, apply a thin layer of Vanilla gel polish as your base colour. This soft, neutral shade serves as the perfect backdrop for the rich, marbled tones that define tortoiseshell. Cure under your UV/LED lamp for 60 seconds.
For depth, you can add a second layer of Vanilla and cure again to enhance the opacity.

4. Apply Blooming Gel
- Now it’s time to bring in the star of the show —Blooming Gel. Apply a thin layer over the cured Vanillabase but do not cure it just yet. The key to creating those stunning, marbled effects is allowing the colours to spread naturally over theBlooming Gel.
5. Layer Your Colours for the Tortoiseshell Effect
Here’s where the artistry comes into play. Using a fine detail brush, apply Jet Black in small, irregular patches over the uncured Blooming Gel. Don’t worry about making it too perfect – tortoiseshell is all about organic, fluid shapes.
Next, layer small amounts of Chocolate and Glass Yellow into and around the Jet Black spots to mimic the rich, warm tones of real tortoiseshell. The Blooming Gel will naturally spread the colours, creating that signature marbled effect. You can play around with the placement of colours until you’re happy with the look.
Once satisfied, cure the nails under the lamp for the usual 60 seconds.
6. Seal with Top Coat
To finish, apply a generous layer of Extreme Shine Top Coat to seal in your design and give the nails a high-gloss finish. This will not only protect your intricate tortoiseshell pattern but also add that salon-quality shine your clients will love.
Cure one final time under the UV/LED lamp, and voilà – stunning tortoiseshell nails that are guaranteed to turn heads!

Common Questions About Blooming Gel
Can You Use Blooming Gel as a Base Coat?
No, Blooming Gel should not be used as a base coat. Its primary function is to create artistic effects by allowing gel colours to bloom and spread. For the best results, always apply a 2-in-1 Base Coat before layering with Blooming Gel.
Do You Cure Blooming Gel?
Blooming Gel needs to be applied and left uncured while you work with your gel colours. Once you’ve achieved the desired effect, you then cure the entire design under a UV/LED lamp.
Unlock Nail Art Creativity with The GelBottle Inc™
Tortoiseshell nails are a perfect example of how Blooming Gel can unlock endless creative possibilities. Whether you’re a professional nail tech or a nail art enthusiast, mastering this technique is a must for your skill set. And with The GelBottleInc™’s range of high-quality products, you can create luxurious designs that are sure to impress every client.
Ready to give it a go? Shop our range of gel polishes, Blooming Gel, and nail art essentials to bring your vision to life! For more nail art inspiration and tips, don’t forget to follow us on Instagram and TikTok.
By following this step-by-step guide, you’ll be well on your way to mastering tortoiseshell nails using Blooming Gel. With practice and the right products, the intricate beauty of this timeless design will become a staple in your nail art repertoire.